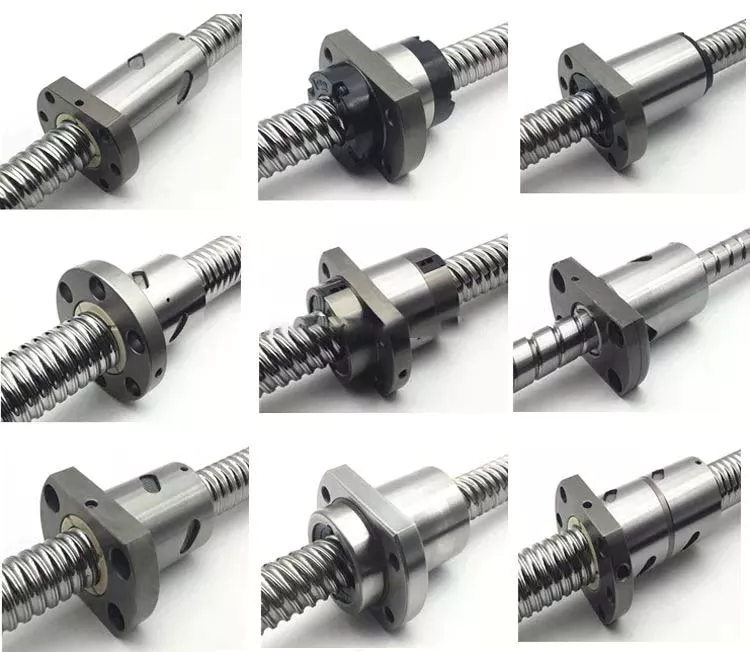
Tag Archives: lawn tractor

China manufacturer Lawn Tractor Deck Lift Lever Torsion Spring Genuine Original Equipment Manufacturer Part with Free Design Custom

Product Description

Item ISO Certificated Customized Torsion Spring With Different Shape
Wire Diameter 0.1mm-8mm
Inside Diameter >=0.3 mm
Outside Diameter >=0.5 mm
Total Coils >=1
Material Stainless Stee(SUS), Spring Steel(SWC), Music Wire(SWP), Mild-Carbon Steel, Phosphor Copper, Beryllium Copper, Brass, Aluminum, Alloy Steel etc.

Dimensions Customized
Surface Treatment Zinc, Nickel, Chrome, Tin, Silver, Copper, Gold,  Dacromet Plating, Blacking, E-coating, Powder coating etc
Samples Time 3-5 Working Days
Delivery Time 10-25 Days
Experience More than 20 years manufacture experience of springs, wire forms and stamping parts
Payment Terms T/T, West Union, Alibaba Trade Assurance Order
Certification ISO9001:2015, SGS, Rohs
Package PE Bag + Carton

FAQ
 
Q: Are you trading company or manufacturer?

A: We are the factory by SGS authenticated.

Q. When can I get the price?
 
A: We usually quote within 24 hours after we got your inquiry. If you are very urgent to get the price, please call us or contact us by email.

Q: How can I get the quotation?

A: Please send us information for quote: drawing, material, weight, quantity and request, we can accept PDF, ISGS, DWG, STEP file format. If you don’t have drawing, please send the sample to us, we can quote based on your sample too.

 Q. Do you accept the OEM?

 A: OEM is welcome. We can custom the goods according to your design . 
 
Q. What is the shipping?

 A: By express(FedEx, UPS, DHL, TNT, EMS, etc…), By Air and By Sea.
  
Q. How do I pay for the order?

 A: The common payments are T/T(Telegraphic Transfer), Western Union, Alibaba Assurance Trade.
 
Q. I have an idea for a new product, but don’t know if it can be manufactured. Can you help?

A: Yes, it is our pleasure to work with potential customers to evaluate the technical feasibility of your idea or design, and we can advise on materials, tooling and so on.
  
Q: What’s your MOQ?

A: In general 1000pcs,but can accept low quantity in some special conditions.

Q: What about the leading time for mass production?

A: Honestly, it depends on the order quantity. Normally, 7 days to 25 days after receiving your deposit.

Q: How if the parts are not good?

A: We can guarantee good quality, but if happened, please contact us immediately and take pictures for us, we will check on the problem and solve it ASAP.


Analytical Approaches to Estimating Contact Pressures in Spline Couplings

A spline coupling is a type of mechanical connection between 2 rotating shafts. It consists of 2 parts – a coupler and a coupling. Both parts have teeth which engage and transfer loads. However, spline couplings are typically over-dimensioned, which makes them susceptible to fatigue and static behavior. Wear phenomena can also cause the coupling to fail. For this reason, proper spline coupling design is essential for achieving optimum performance.
splineshaft

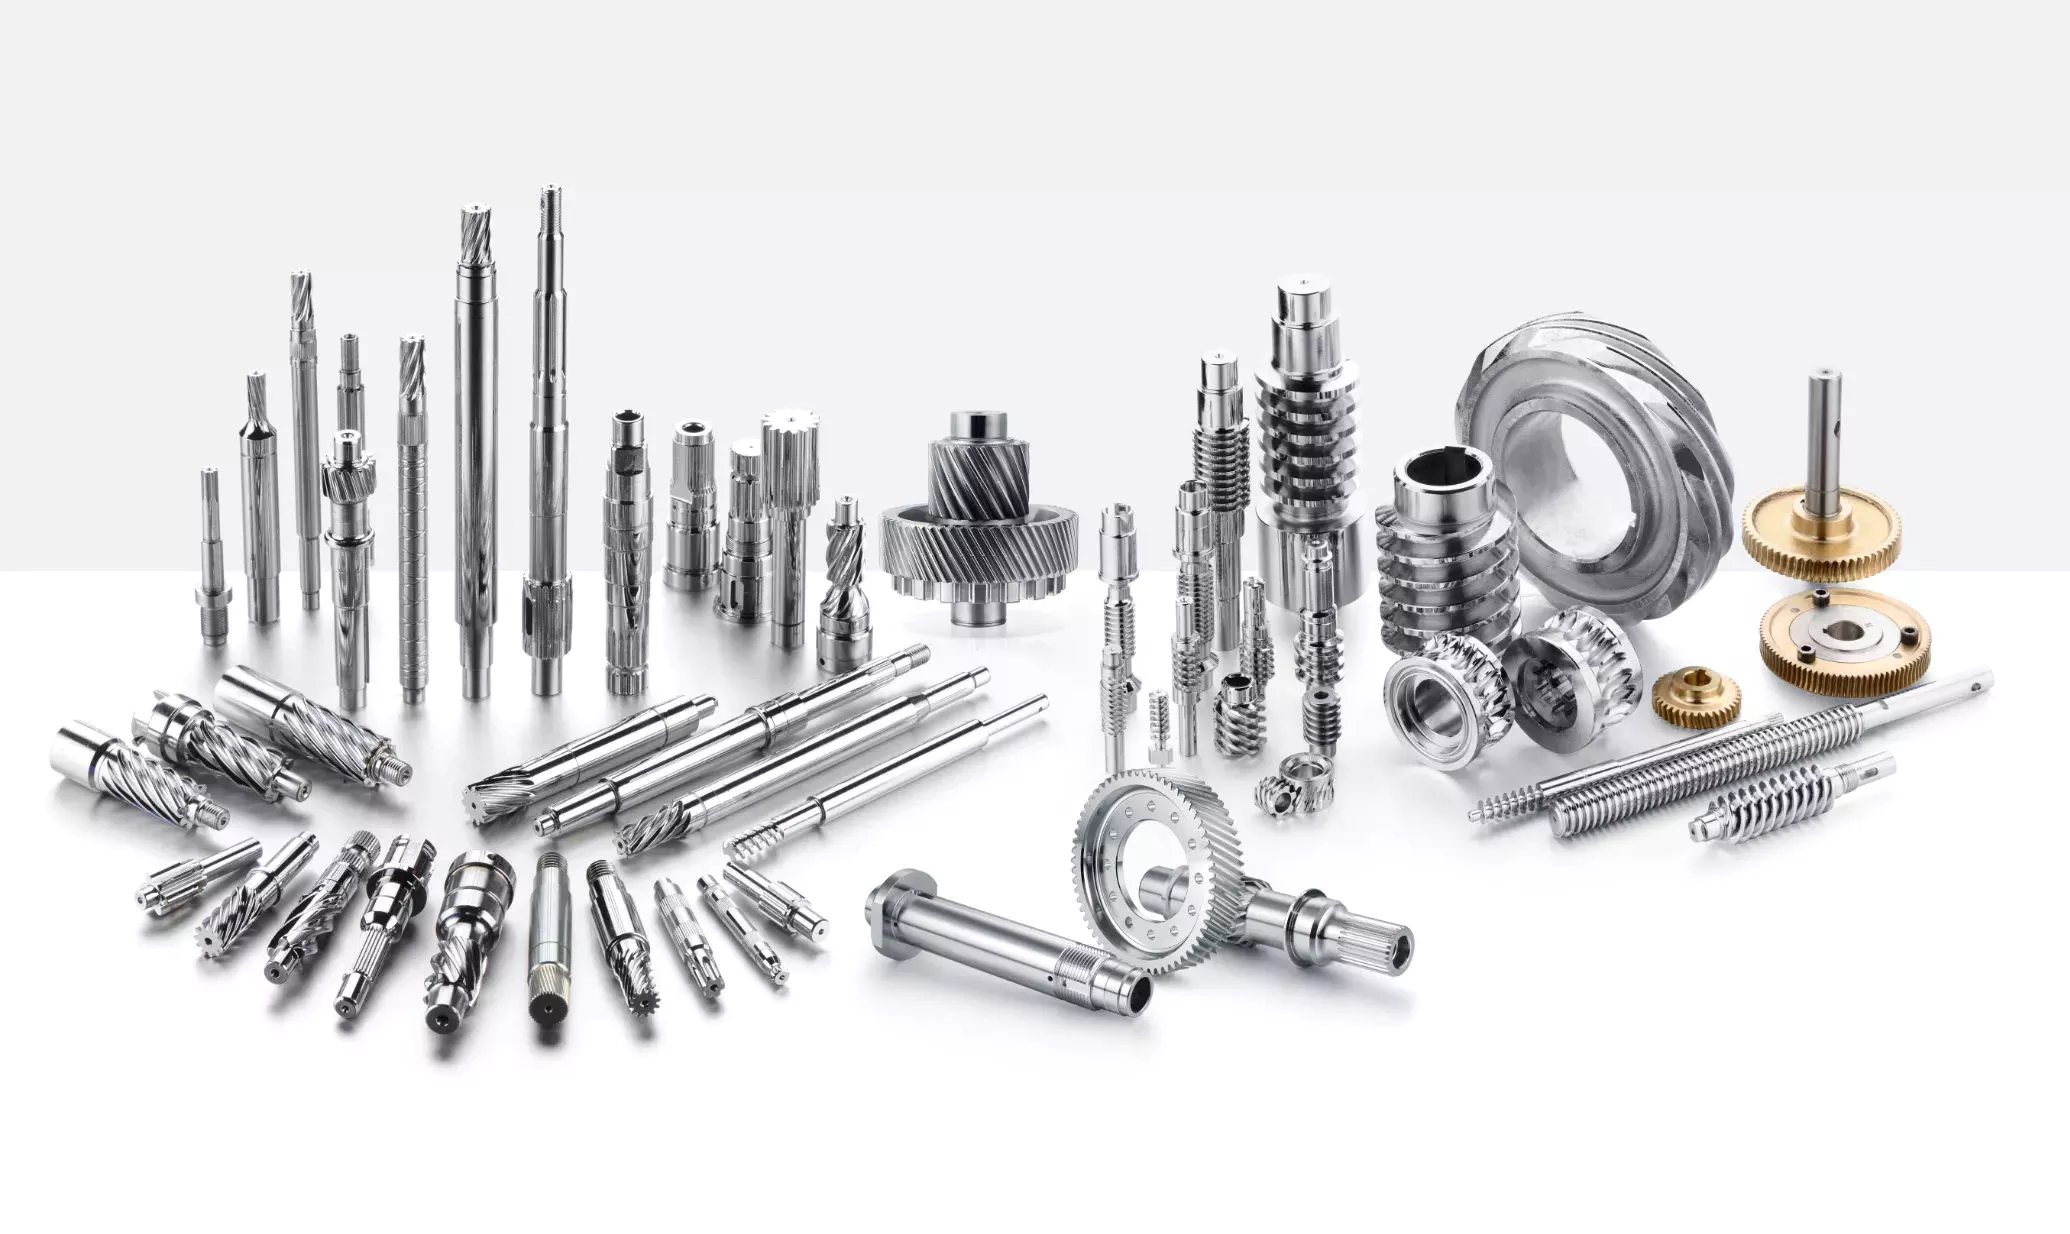
Modeling a spline coupling

Spline couplings are becoming increasingly popular in the aerospace industry, but they operate in a slightly misaligned state, causing both vibrations and damage to the contact surfaces. To solve this problem, this article offers analytical approaches for estimating the contact pressures in a spline coupling. Specifically, this article compares analytical approaches with pure numerical approaches to demonstrate the benefits of an analytical approach.
To model a spline coupling, first you create the knowledge base for the spline coupling. The knowledge base includes a large number of possible specification values, which are related to each other. If you modify 1 specification, it may lead to a warning for violating another. To make the design valid, you must create a spline coupling model that meets the specified specification values.
After you have modeled the geometry, you must enter the contact pressures of the 2 spline couplings. Then, you need to determine the position of the pitch circle of the spline. In Figure 2, the centre of the male coupling is superposed to that of the female spline. Then, you need to make sure that the alignment meshing distance of the 2 splines is the same.
Once you have the data you need to create a spline coupling model, you can begin by entering the specifications for the interface design. Once you have this data, you need to choose whether to optimize the internal spline or the external spline. You’ll also need to specify the tooth friction coefficient, which is used to determine the stresses in the spline coupling model 20. You should also enter the pilot clearance, which is the clearance between the tip 186 of a tooth 32 on 1 spline and the feature on the mating spline.
After you have entered the desired specifications for the external spline, you can enter the parameters for the internal spline. For example, you can enter the outer diameter limit 154 of the major snap 54 and the minor snap 56 of the internal spline. The values of these parameters are displayed in color-coded boxes on the Spline Inputs and Configuration GUI screen 80. Once the parameters are entered, you’ll be presented with a geometric representation of the spline coupling model 20.

Creating a spline coupling model 20

The spline coupling model 20 is created by a product model software program 10. The software validates the spline coupling model against a knowledge base of configuration-dependent specification constraints and relationships. This report is then input to the ANSYS stress analyzer program. It lists the spline coupling model 20’s geometric configurations and specification values for each feature. The spline coupling model 20 is automatically recreated every time the configuration or performance specifications of the spline coupling model 20 are modified.
The spline coupling model 20 can be configured using the product model software program 10. A user specifies the axial length of the spline stack, which may be zero, or a fixed length. The user also enters a radial mating face 148, if any, and selects a pilot clearance specification value of 14.5 degrees or 30 degrees.
A user can then use the mouse 110 to modify the spline coupling model 20. The spline coupling knowledge base contains a large number of possible specification values and the spline coupling design rule. If the user tries to change a spline coupling model, the model will show a warning about a violation of another specification. In some cases, the modification may invalidate the design.
In the spline coupling model 20, the user enters additional performance requirement specifications. The user chooses the locations where maximum torque is transferred for the internal and external splines 38 and 40. The maximum torque transfer location is determined by the attachment configuration of the hardware to the shafts. Once this is selected, the user can click “Next” to save the model. A preview of the spline coupling model 20 is displayed.
The model 20 is a representation of a spline coupling. The spline specifications are entered in the order and arrangement as specified on the spline coupling model 20 GUI screen. Once the spline coupling specifications are entered, the product model software program 10 will incorporate them into the spline coupling model 20. This is the last step in spline coupling model creation.
splineshaft

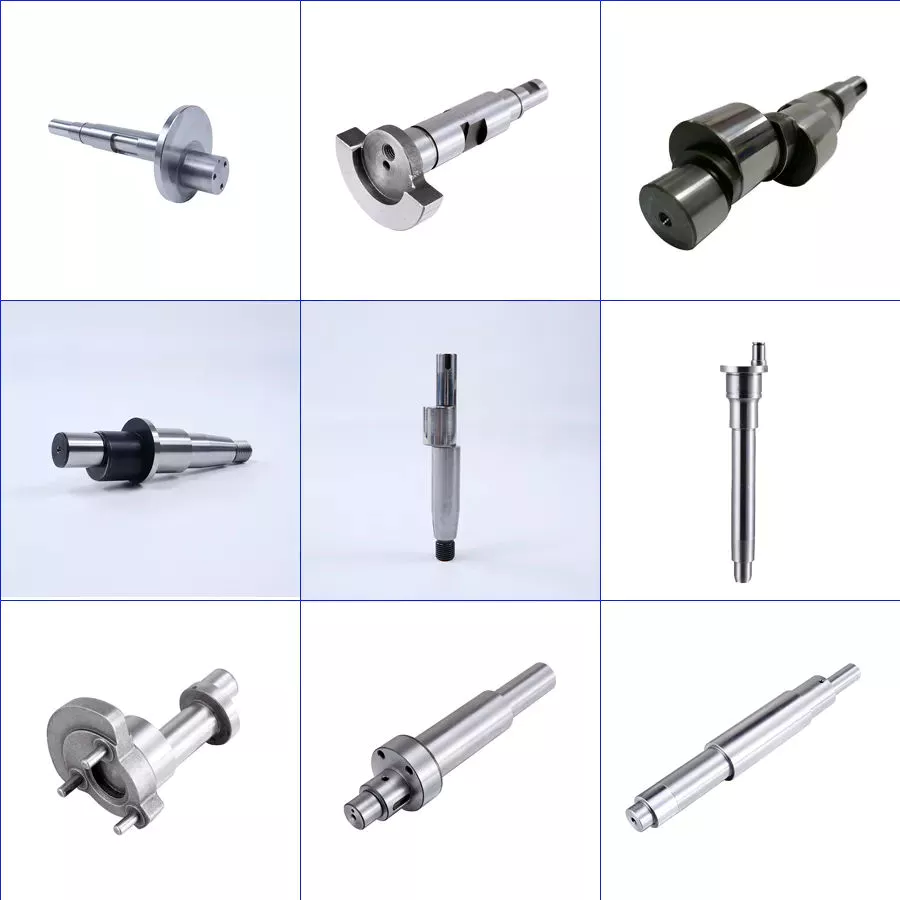
Analysing a spline coupling model 20

An analysis of a spline coupling model consists of inputting its configuration and performance specifications. These specifications may be generated from another computer program. The product model software program 10 then uses its internal knowledge base of configuration dependent specification relationships and constraints to create a valid three-dimensional parametric model 20. This model contains information describing the number and types of spline teeth 32, snaps 34, and shoulder 36.
When you are analysing a spline coupling, the software program 10 will include default values for various specifications. The spline coupling model 20 comprises an internal spline 38 and an external spline 40. Each of the splines includes its own set of parameters, such as its depth, width, length, and radii. The external spline 40 will also contain its own set of parameters, such as its orientation.
Upon selecting these parameters, the software program will perform various analyses on the spline coupling model 20. The software program 10 calculates the nominal and maximal tooth bearing stresses and fatigue life of a spline coupling. It will also determine the difference in torsional windup between an internal and an external spline. The output file from the analysis will be a report file containing model configuration and specification data. The output file may also be used by other computer programs for further analysis.
Once these parameters are set, the user enters the design criteria for the spline coupling model 20. In this step, the user specifies the locations of maximum torque transfer for both the external and internal spline 38. The maximum torque transfer location depends on the configuration of the hardware attached to the shafts. The user may enter up to 4 different performance requirement specifications for each spline.
The results of the analysis show that there are 2 phases of spline coupling. The first phase shows a large increase in stress and vibration. The second phase shows a decline in both stress and vibration levels. The third stage shows a constant meshing force between 300N and 320N. This behavior continues for a longer period of time, until the final stage engages with the surface.
splineshaft

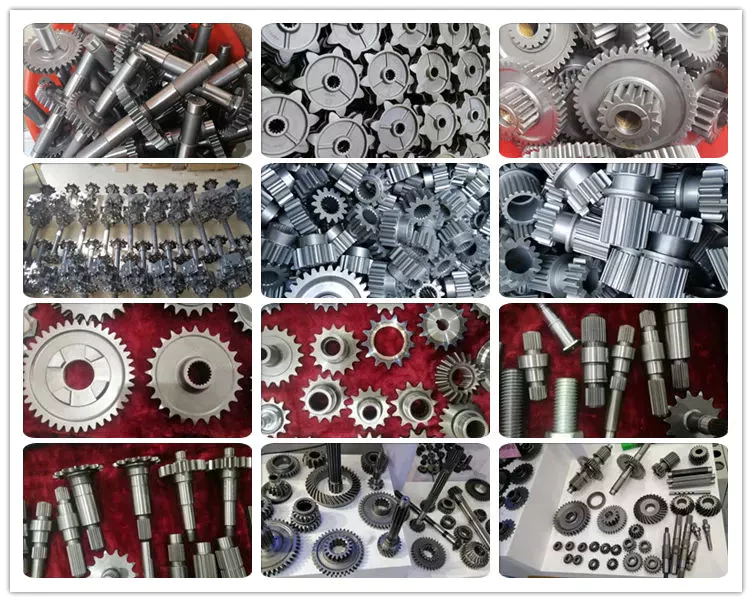
Misalignment of a spline coupling

A study aimed to investigate the position of the resultant contact force in a spline coupling engaging teeth under a steady torque and rotating misalignment. The study used numerical methods based on Finite Element Method (FEM) models. It produced numerical results for nominal conditions and parallel offset misalignment. The study considered 2 levels of misalignment – 0.02 mm and 0.08 mm – with different loading levels.
The results showed that the misalignment between the splines and rotors causes a change in the meshing force of the spline-rotor coupling system. Its dynamics is governed by the meshing force of splines. The meshing force of a misaligned spline coupling is related to the rotor-spline coupling system parameters, the transmitting torque, and the dynamic vibration displacement.
Despite the lack of precise measurements, the misalignment of splines is a common problem. This problem is compounded by the fact that splines usually feature backlash. This backlash is the result of the misaligned spline. The authors analyzed several splines, varying pitch diameters, and length/diameter ratios.
A spline coupling is a two-dimensional mechanical system, which has positive backlash. The spline coupling is comprised of a hub and shaft, and has tip-to-root clearances that are larger than the backlash. A form-clearance is sufficient to prevent tip-to-root fillet contact. The torque on the splines is transmitted via friction.
When a spline coupling is misaligned, a torque-biased thrust force is generated. In such a situation, the force can exceed the torque, causing the component to lose its alignment. The two-way transmission of torque and thrust is modeled analytically in the present study. The analytical approach provides solutions that can be integrated into the design process. So, the next time you are faced with a misaligned spline coupling problem, make sure to use an analytical approach!
In this study, the spline coupling is analyzed under nominal conditions without a parallel offset misalignment. The stiffness values obtained are the percentage difference between the nominal pitch diameter and load application diameter. Moreover, the maximum percentage difference in the measured pitch diameter is 1.60% under a torque of 5000 N*m. The other parameter, the pitch angle, is taken into consideration in the calculation.

China manufacturer Lawn Tractor Deck Lift Lever Torsion Spring Genuine Original Equipment Manufacturer Part     with Free Design CustomChina manufacturer Lawn Tractor Deck Lift Lever Torsion Spring Genuine Original Equipment Manufacturer Part     with Free Design Custom

China manufacturer 48″ Lawn Tractor Deck Ayp 174356 Spindle Assembly Shaft 175147 Part with Free Design Custom

Product Description

48″ Spindle Shaft with Bearings and grease fitting Replacement For 174356, 532174356 Spindle Assembly

Fits Craftsman, Hus qvarna, 48″ Decks  
Oregon  85-040
spindle AYP 174356,shaft #175147
Husq varna-
Husq varna–532174356

Mounting Holes Are Tapped (mounting bolts included), Also Includes Blade Bolt (174365) Pulley Locknut (178342) and Spacer (129963 or 187690)

OTHER CRAFTSMAN LAWN TRACTOR 48″ KIT PARTS
3 SPINDLE ASSEMBLIES AYP
SPINDLE ASSEMBLY . SPINDLE SHAFT FITS 48 In. DECKS BUILT AFTER 2
AYP/ROPER/SEARS 532174356
 
3 BLADES AYP 16-5/8In.X 5POINT STAR MULCHER
MULCHING BLADE FOR 48 In. CUT.
WIDTH:2-1/2″
THICKNESS:0.2040″
LENGTH:16-5/8″
REPLACES:
AYP/ROPER/SEARS 173921
AYP/ROPER/SEARS 532173921

1 SPLINED DECK PULLEY

SPLINED PULLEY 4-7/8 In. DIA. FITS 48 In. DECKS.

ID:5/8″
OD:4-7/8″

REPLACES:
AYP/ROPER/SEARS 174375
AYP/ROPER/SEARS 53215711
AYP/ROPER/SEARS 532174375
AYP/ROPER/SEARS 539-15711
1 PULLEY IDLER FLAT 3/8In. X 3-7/8In.
FLAT IDLER PULLEY. FITS 48 In. DECKS FROM 2
AYP/ROPER/SEARS 193197
AYP/ROPER/SEARS 532177968
HUS QVARNA -68
HUS QVARNA -97

1 PULLEY IDLER FLAT 3/8In. X 4-1/2In.

FLAT IDLER PULLEY. FITS: 48 In. DECKS FROM 2
AYP/ROPER/SEARS 532175820
HUs QVARNA -20
1 BELT DECK 5/8In.X 90In. 

PRIMARY DECK BELT.  FITS 48 In. RIDERS. POLYESTER CORD CONSTRUCTION.

LENGTH:90″
WIDTH:5/8″

REPLACES:
AYP/ROPER/SEARS 174368
AYP/ROPER/SEARS 532174368
HUSQ VARNA -68

BELT DECK 5/8In.X 89In.
SECONDARY DECK BELT.  FITS AYP & POXIHU (WEST LAKE) DIS. PRO UNITS. POLYESTER CORD CONSTRUCTION.
LENGTH:89″
WIDTH:5/8″

REPLACES:
AYP/ROPER/SEARS 174369
AYP/ROPER/SEARS 180808
AYP/ROPER/SEARS 532180808
HUSQ VARNA -71
HUSQ VARNA -69
HUSQ VARNA 532180808
SCREW HEX HEAD SELF-TAPPING 5/16In.-18X1In.
THREAD SIZE:5/16-18″
THREAD LENGTH:1″

Worm Shafts and Gearboxes

If you have a gearbox, you may be wondering what the best Worm Shaft is for your application. There are several things to consider, including the Concave shape, Number of threads, and Lubrication. This article will explain each factor and help you choose the right Worm Shaft for your gearbox. There are many options available on the market, so don’t hesitate to shop around. If you are new to the world of gearboxes, read on to learn more about this popular type of gearbox.
worm shaft

Concave shape

The geometry of a worm gear varies considerably depending on its manufacturer and its intended use. Early worms had a basic profile that resembled a screw thread and could be chased on a lathe. Later, tools with a straight sided g-angle were developed to produce threads that were parallel to the worm’s axis. Grinding was also developed to improve the finish of worm threads and minimize distortions that occur with hardening.
To select a worm with the proper geometry, the diameter of the worm gear must be in the same unit as the worm’s shaft. Once the basic profile of the worm gear is determined, the worm gear teeth can be specified. The calculation also involves an angle for the worm shaft to prevent it from overheating. The angle of the worm shaft should be as close to the vertical axis as possible.
Double-enveloping worm gears, on the other hand, do not have a throat around the worm. They are helical gears with a straight worm shaft. Since the teeth of the worm are in contact with each other, they produce significant friction. Unlike double-enveloping worm gears, non-throated worm gears are more compact and can handle smaller loads. They are also easy to manufacture.
The worm gears of different manufacturers offer many advantages. For instance, worm gears are 1 of the most efficient ways to increase torque, while lower-quality materials like bronze are difficult to lubricate. Worm gears also have a low failure rate because they allow for considerable leeway in the design process. Despite the differences between the 2 standards, the overall performance of a worm gear system is the same.
The cone-shaped worm is another type. This is a technological scheme that combines a straight worm shaft with a concave arc. The concave arc is also a useful utility model. Worms with this shape have more than 3 contacts at the same time, which means they can reduce a large diameter without excessive wear. It is also a relatively low-cost model.
worm shaft

Thread pattern

A good worm gear requires a perfect thread pattern. There are a few key parameters that determine how good a thread pattern is. Firstly, the threading pattern must be ACME-threaded. If this is not possible, the thread must be made with straight sides. Then, the linear pitch of the “worm” must be the same as the circular pitch of the corresponding worm wheel. In simple terms, this means the pitch of the “worm” is the same as the circular pitch of the worm wheel. A quick-change gearbox is usually used with this type of worm gear. Alternatively, lead-screw change gears are used instead of a quick-change gear box. The pitch of a worm gear equals the helix angle of a screw.
A worm gear’s axial pitch must match the circular pitch of a gear with a higher axial pitch. The circular pitch is the distance between the points of teeth on the worm, while the axial pitch is the distance between the worm’s teeth. Another factor is the worm’s lead angle. The angle between the pitch cylinder and worm shaft is called its lead angle, and the higher the lead angle, the greater the efficiency of a gear.
Worm gear tooth geometry varies depending on the manufacturer and intended use. In early worms, threading resembled the thread on a screw, and was easily chased using a lathe. Later, grinding improved worm thread finishes and minimized distortions from hardening. As a result, today, most worm gears have a thread pattern corresponding to their size. When selecting a worm gear, make sure to check for the number of threads before purchasing it.
A worm gear’s threading is crucial in its operation. Worm teeth are typically cylindrical, and are arranged in a pattern similar to screw or nut threads. Worm teeth are often formed on an axis of perpendicular compared to their parallel counterparts. Because of this, they have greater torque than their spur gear counterparts. Moreover, the gearing has a low output speed and high torque.

Number of threads

Different types of worm gears use different numbers of threads on their planetary gears. A single threaded worm gear should not be used with a double-threaded worm. A single-threaded worm gear should be used with a single-threaded worm. Single-threaded worms are more effective for speed reduction than double-threaded ones.
The number of threads on a worm’s shaft is a ratio that compares the pitch diameter and number of teeth. In general, worms have 1,2,4 threads, but some have three, five, or six. Counting thread starts can help you determine the number of threads on a worm. A single-threaded worm has fewer threads than a multiple-threaded worm, but a multi-threaded worm will have more threads than a mono-threaded planetary gear.
To measure the number of threads on a worm shaft, a small fixture with 2 ground faces is used. The worm must be removed from its housing so that the finished thread area can be inspected. After identifying the number of threads, simple measurements of the worm’s outside diameter and thread depth are taken. Once the worm has been accounted for, a cast of the tooth space is made using epoxy material. The casting is moulded between the 2 tooth flanks. The V-block fixture rests against the outside diameter of the worm.
The circular pitch of a worm and its axial pitch must match the circular pitch of a larger gear. The axial pitch of a worm is the distance between the points of the teeth on a worm’s pitch diameter. The lead of a thread is the distance a thread travels in 1 revolution. The lead angle is the tangent to the helix of a thread on a cylinder.
The worm gear’s speed transmission ratio is based on the number of threads. A worm gear with a high ratio can be easily reduced in 1 step by using a set of worm gears. However, a multi-thread worm will have more than 2 threads. The worm gear is also more efficient than single-threaded gears. And a worm gear with a high ratio will allow the motor to be used in a variety of applications.
worm shaft

Lubrication

The lubrication of a worm gear is particularly challenging, due to its friction and high sliding contact force. Fortunately, there are several options for lubricants, such as compounded oils. Compounded oils are mineral-based lubricants formulated with 10 percent or more fatty acid, rust and oxidation inhibitors, and other additives. This combination results in improved lubricity, reduced friction, and lower sliding wear.
When choosing a lubricant for a worm shaft, make sure the product’s viscosity is right for the type of gearing used. A low viscosity will make the gearbox difficult to actuate and rotate. Worm gears also undergo a greater sliding motion than rolling motion, so grease must be able to migrate evenly throughout the gearbox. Repeated sliding motions will push the grease away from the contact zone.
Another consideration is the backlash of the gears. Worm gears have high gear ratios, sometimes 300:1. This is important for power applications, but is at the same time inefficient. Worm gears can generate heat during the sliding motion, so a high-quality lubricant is essential. This type of lubricant will reduce heat and ensure optimal performance. The following tips will help you choose the right lubricant for your worm gear.
In low-speed applications, a grease lubricant may be sufficient. In higher-speed applications, it’s best to apply a synthetic lubricant to prevent premature failure and tooth wear. In both cases, lubricant choice depends on the tangential and rotational speed. It is important to follow manufacturer’s guidelines regarding the choice of lubricant. But remember that lubricant choice is not an easy task.

China manufacturer 48China manufacturer 48

China Custom Tractor Three Point Link Flail Mower Parts Ride on Lawn Mower with Free Design Custom

Product Description


MODEL AGL-125 AGL-145 AGL-165
Structure Weight 263kg 280kg 298kg
Tilt-Up Angle 90° 90° 90°
Tilt-Down Angle 55° 55° 55°
Cutting Width 1200mm 1400mm 1600mm
Flail Type Y Blade / Hammer
Number Of Flails Hammer: 18 / Y Blade: 36 Hammer: 22 / Y Blade: 44 Hammer: 26  /    Y Blade: 52   
Vertical Extending Distance 1415mm 1415mm 1415mm
Horizontal Extending Distance 1870mm 2070mm 2270mm
PTO Speed 540r/min 540r/min 540r/min
Tractor HP 20-40hp 30-45hp 40-50hp

The verge mower is ideal for roadside verge,tree trimming and general mulching. Side and inclining is hydraulic adjusted. 90°tilt up 55°tilt down or can cut directly behind the tractor. High power 50hp gearbox. Self leveling. High strength mulching blades. Safety fenders behind the mower to prevent the mud or small stones from the mower deck. Ideal for the smaller tractors due to their lighter weight design than the AGF model. Available cut sizes ranging from 1.25-1.65m.

HangZhou Qianyi Machinery Technology Co.,Ltd existing staff 50 people, in 2571 passed the ISO9001 quality system certification and passed CE certification.

Accumulated after years of development, we have many advanced equipment, like Germany fast Trulaser3030 laser cutting ,machine, CNC punch press TruPunch1000, CNC shearing machine, CNC lathe, bending machine, seam welding machine and more than 1 formula 1-160-1 high-end mechanical production equipment.

We provide good design, to help customers reduce costs of development and improve production efficiency. With complete testing equipment, strict quality control and abundant technical force, our machines are mainly exported to European, North American and Southeast Asian countries.

All of our machines are with 1 year warranty. We often insist on 1 principle”Better quality!Better service!Better price!”

Specifying a Ball Screw

When you need a high-quality ball screw, it is important to select 1 with the proper dimensions and specifications. When you are looking for the best product, you should consider features such as preloading, surface finish, and internal return system. You can learn more about these features in this article. If you’re unsure which type of ball screw to select, contact a reputable supplier for further guidance. To find the best product for your needs, click here!
air-compressor

Brinelling

When specifying a Brinelling ball screw, it is crucial to know how much axial load it can safely bear. The static load capacity, which is given in the catalogue, applies only to pure axial loading, and any radial load that is smaller than 5% of the axial load won’t pose a problem. For more information, contact a CZPT engineer. Brinelling ball screw service life calculation should be performed using the following data:
Preload: The amount of load a ball screw can handle during a single revolution. Preload is the load applied before the ball screw starts moving, and the load is usually between 5 and 10 percent of the dynamic capacity. However, a ball screw that is subject to vibration will experience higher preload, requiring more frequent lubrication. The resulting mechanical stress may cause the ball screw to buckle, or cause the nut to re-circulate the balls.
Critical ball speed: The maximum speed at which the ball can move through the ball nut is called the critical ball speed. In contrast, running the ball screw at its critical shaft speed can lead to excessive vibrations, leading to premature failure of the end support bearings and brinelling of the ball track. Thus, it is recommended to operate a ball screw at a lower speed than the critical ball speed to prevent brinelling and plastic deformation of the balls.
False brinelling: False brinelling is a form of Fretting. False brinelling occurs when the bearings are not rotating. The movement will result in depressions or wear marks in the bearing raceway. This will cause noise, wear, and eventual fatigue. If these conditions persist, a newer ball screw should be used to test the system. The machine should be run for several hours and tested before replacing the bearing.

Preloading

The process of preloading ball screws minimizes backlash by applying pressure to the threads in the opposite direction of the screw’s direction of rotation. It prevents any movement of the screw relative to the nut. Various methods are used for preloading. A common 1 is to use oversized balls inside the ball nut. A double nut system may also be used. Both methods are equally effective. Regardless of the method used, the end result is the same – minimal backlash and increased efficiency.
In the conventional method of preloading ball screws, the motors operate simultaneously in opposite directions, causing them to have a relative motion of approximately equal magnitudes. This reduces the frictional resistance of the system, resulting in rapid traverse. The system is able to operate with minimal backlash during 110 inches of travel, reducing the heat developed by the drive nuts and the problems associated with ball screw heating. Moreover, this method can be used in a wide range of applications.
Another method of preloading ball screws is known as the ball-select method. This method includes the use of over-sized balls that force the balls into more contacts with the screw and nut than a normal ball screw. The advantage of this method is that it reduces backlash because the balls are not machined to high tolerances. The disadvantage of this method is that the ball screw will cost more to manufacture than a standard ball screw and nut.
A conventional design includes a mechanical mechanism that uses a series of balls to rotate a shaft. The problem of backlash is exacerbated by the mass of the shaft. The mechanical system is more complex than necessary and often requires a lot of effort. The present invention eliminates these problems by providing an improved method and apparatus for driving ball screws. This method provides a more efficient preload force that is dynamically adjustable while the mechanism is operating. The method can also improve friction and wear.
air-compressor

Internal return system

There are 2 different types of ball screws. The first type is external and the second is internal. The external type uses return tubes that protrude from the ball nut and extend above and around the outside of the screw. The internal type uses a single tube that spans the ball track, while the more common design uses multiple tubes spanning 1.5 to 3.5 ball tracks. The internal system involves a single return tube and several pickup fingers that guide the balls into the tubes.
The external return tube design is an easier, less expensive choice. The external ball return system has limited space but can handle a wide range of shaft diameters and leads. However, its physical size makes it incompatible with many high-speed applications. Therefore, careful consideration should be given to the mounting options. Internal ball return systems are best suited for small leads and ball sizes. Those that need a high speed will likely benefit from the external ball return system.
Internal ball screw technology has also kept pace with the demands of linear drive systems. Ball screw technology is now more durable than ever. Robust internal ball return systems circulate ball bearings through a solid pickup pin. These deflectors help the balls return to the screw in the correct location. They are crucial components in computer-controlled motion control systems and wire bonding. If you’re interested in the latest advances in linear screw technology, contact us today.
Ball screws are superior to lead screws in many ways. Ball screws are more efficient than lead screws, converting 90% of rotational motion into linear motion. As a result, they are more expensive than lead screws and acme screws. They also provide a smoother movement over the entire travel range. Furthermore, they require less power for the same performance. It’s no wonder that the ball screw is so popular in many different applications.

Surface finish

The surface finish of a ball screw is 1 of the key factors in determining the performance of the system. A ball screw with a good surface finish has superior performance in rolling resistance, backlash, and wear characteristics. However, it is critical to improve the surface finish of a ball screw to achieve precision movement, low wear, and low noise. To achieve this, special wire brushes will be used to polish precision-ground shafts.
For a ball screw to perform well, it must be hard, have a smooth surface, and retain lubricant. The surface finish of a ball screw should be smooth, free of cracks, and retain the lubricant well. Cracks and annealing are both undesirable during the manufacturing process, so a quality machine should be used for its surface finish. During the production process, a CBN cutting insert with full round or gothic arch profile can be used to achieve a high-quality surface finish.
Another finishing operation used in the manufacture of ball screws is lapping. Lapping improves surface quality and travel variation. It involves complex relative movements of abrasive particulates with the workpiece. This removes a thin layer of material from the workpiece, improving its surface quality and dimensional accuracy. The lapping process can be carried out under low-pressure conditions. It also enhances the friction torque and lubrication.
In lapping experiments, friction torque has the largest influence on travel variation and surface roughness. A friction torque of about 1 N x m is optimum. In addition, rotational speed has only a minimal effect. The best combination of these parameters is 1-1.5 N x m and 30 rpm. The minimum surface finish of a ball screw is around 800 mesh. The smallest variation in travel is observed at around half-way through the travel.
air-compressor

Lubrication

Proper lubrication of ball screw assemblies is critical to maintain optimum performance and life. Ball screw assemblies should be lubricated with grease, which is introduced directly into the ball nut. The lubrication port can be located at various locations on the product, including on the flange or in the external threads of the ball nut. Some ball nuts also feature a zerk fitting for easier lubrication.
The lubrication of ball screws is required in the case of operating conditions over 100oC. The minimum load for a ball screw is usually realized with a preload force. The lubricant is conveyed through the narrow lubrication gap due to the relative movement of the 2 surfaces. The increased viscosity of the lubricant enables separation of the contact surfaces. To avoid over-lubrication, it is important to check the lubricant level regularly.
The oil used in lubrication of ball screw assemblies can be either mineral or synthetic. The oil is composed of mineral or synthetic oil, additives, and a thickening agent, such as lithium or bentonite. Other thickening agents include lithium, barium complexes, or aluminum. The lubricant grade NLGI is a widely used classification for lubricating greases. It is not sufficient to choose a specific type of lubricant for a particular application, but it provides a qualitative measure.
Despite being essential to the performance of a ball screw, lubrication is also essential to its lifespan. Different types of lubricant offer corrosion protection. Before using a lubricant, make sure to thoroughly clean and dry the ball screw. If there is any buildup of dirt, it may damage the screw. To prevent this from occurring, you can use a solvent or lint-free cloth. Lubrication of ball screw assemblies can greatly extend the life of the assembly.

China Custom Tractor Three Point Link Flail Mower Parts Ride on Lawn Mower     with Free Design CustomChina Custom Tractor Three Point Link Flail Mower Parts Ride on Lawn Mower     with Free Design Custom